
Darkroom
Enlarging Print Basics Tips and Tricks
Posted by Bengt Köhler Sandberg 2013-06-21 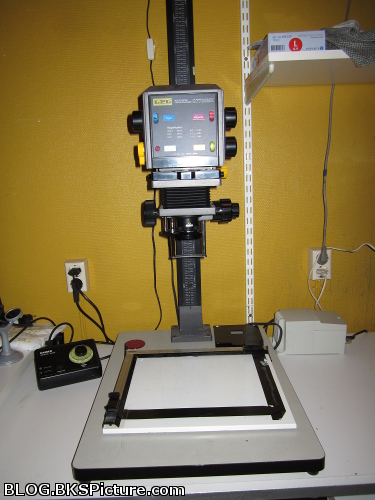 The art of enlarging a analogue print is not many that master now days but this can be very fun and not always that difficult. Here are a little basics how you can do a enlarged print of your negative. What do you need to get started? You basically just need a enlarger which can take you negative + appropriate lens. And then the trays to develop the papers in. (Have a own post how to develop prints here) But there are also a few things which can be good to have but are not a must. - Exposure timer. - Safelight so you don't have to work in complete darkness. - Focus Finder - Masking easels Lenses for your
enlarger
There are quite a lot of enlarger lenses to choose from but the focal length is mostly what size of negatives it can cover. A 50mm lens for example can cover up to a 24x36 mm standard full frame negative. And this will not work for a medium format negative. 80mm for up to 6x7 cm 105mm for up to 6x9 cm 135mm or 150mm for up to 4x5" (large format) Etc...
The Enlarger
There are a ton of different brand and models but them all work more or less the same. You move the entire enlarger up or down to get a smaller or bigger image. Little knop for focus and a film holder for your negative. Quite common that these can take different types of film sizes. And the ones I mostly have seen have holder for 6x6 medium format plus a 24×36 standard full frame holder. Place the film in the film holder with the emulsion facing down. You will get a mirrored image if you put it the other way around. Align so you get the framing that you want and then set the focus. Finding focus with the naked eye can be quite tricky to get it spot on. But there is a simple tool for this which is called a Focus Finder. You place this where the paper will be placed. Turn on the enlargers light and set lens on it's biggest aperture so it's easier to se. The focus finder works like a very zoomed in microscope. Look true the focus finder and move the enlargers focus. You will not see much and what you be looking for are film grain. The focus is spot on then the grain are at its sharpest. 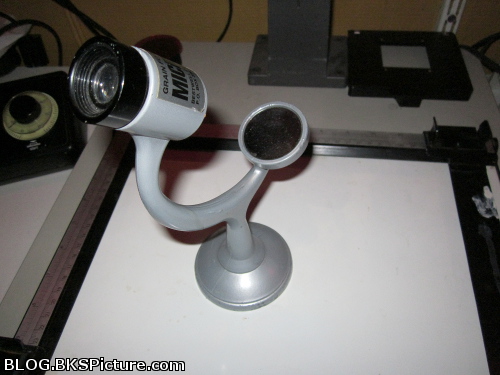 Now you are all set up to make your print. But how long exposure do I need and what f/stop do I use on the lens? The lens f/stop depends a little on what lens you are using and what exposure times you need. A lens is often sharpest somewhere in the middle of it's f/stops. So I usually use f/8 on a 50mm which have apertures from f/2.8 to f/16. And f/11 on a 80mm which have apertures from f/4 to f/22. This also depends on how long exposure I might get. And you can get impractical long exposure time so can you use a bigger f/stop to get a faster one. How to get a good exposure then. There are a few ways but I use the simplest and I would guess the most common. I start by taking the paper I want to use for the print. Take one paper and cutting it in smaller strands. Placing on strand under the enlarger and then take a exposure test. You can take many smaller exposures on one paper strand by using a piece of cardboard or something light proof. Take maybe 5 sec exposure and only expose a piece of the strand After 5 sec you can move down the cardboard a little so you expose a little more of the strand. Take another 5 sec and do this for as many times you think is needed. The results will end up with a small strand with gradually gets darker. Look for the one that you think works the best and then you just need to count how much time you need. So for example if the exposure looks best three exposure from the darkest side. You then need 15 sec if you used 5 sec intervals. Judging a whole image from this little test strand can on the other hand be hard. And it can be sometimes good to use an longer strand and expose it all to test your exposure and judge the contrast etc. 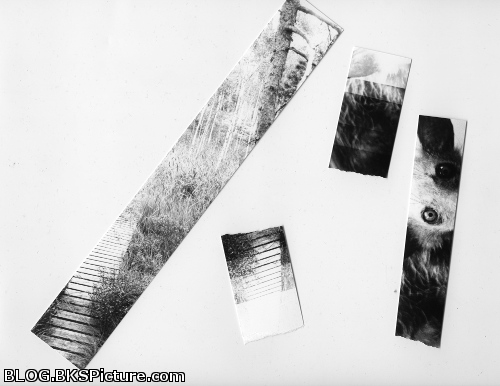 That was all for this, but I also have some related posts about darkroom use: Develop B&W Film or Paper Enlarging Print Basics Burning and Dodging Controlling Contrast Contact Printing Writing down what you are doing Print examples Want
to help me out?
Make my site known by sharing it with your friends and family. This helps and would be really appreciated, thanks!
My facebook page

|
 |